Join a Server — Nintendo Switch
This guide walks you through every step to connect your Nintendo Switch to a custom Minecraft server. Follow along — it's easier than it looks!
This method only works with an iPhone or iPad. Android phones cannot be used to connect a Nintendo Switch. There is no workaround — you need an Apple device.
What you need
- An iPhone or iPad with the BedrockConnect app installed
- Your iPhone and Switch must be on the same Wi-Fi network
- A Nintendo Switch Online membership
Do not use a VPN, mobile data, or a strict firewall. Both devices need to be on the same Wi-Fi for this to work.
Part 1: Set up the app on your iPhone
1. Open BedrockConnect
Open the app on your iPhone. If it's your first time, confirm the information prompts.
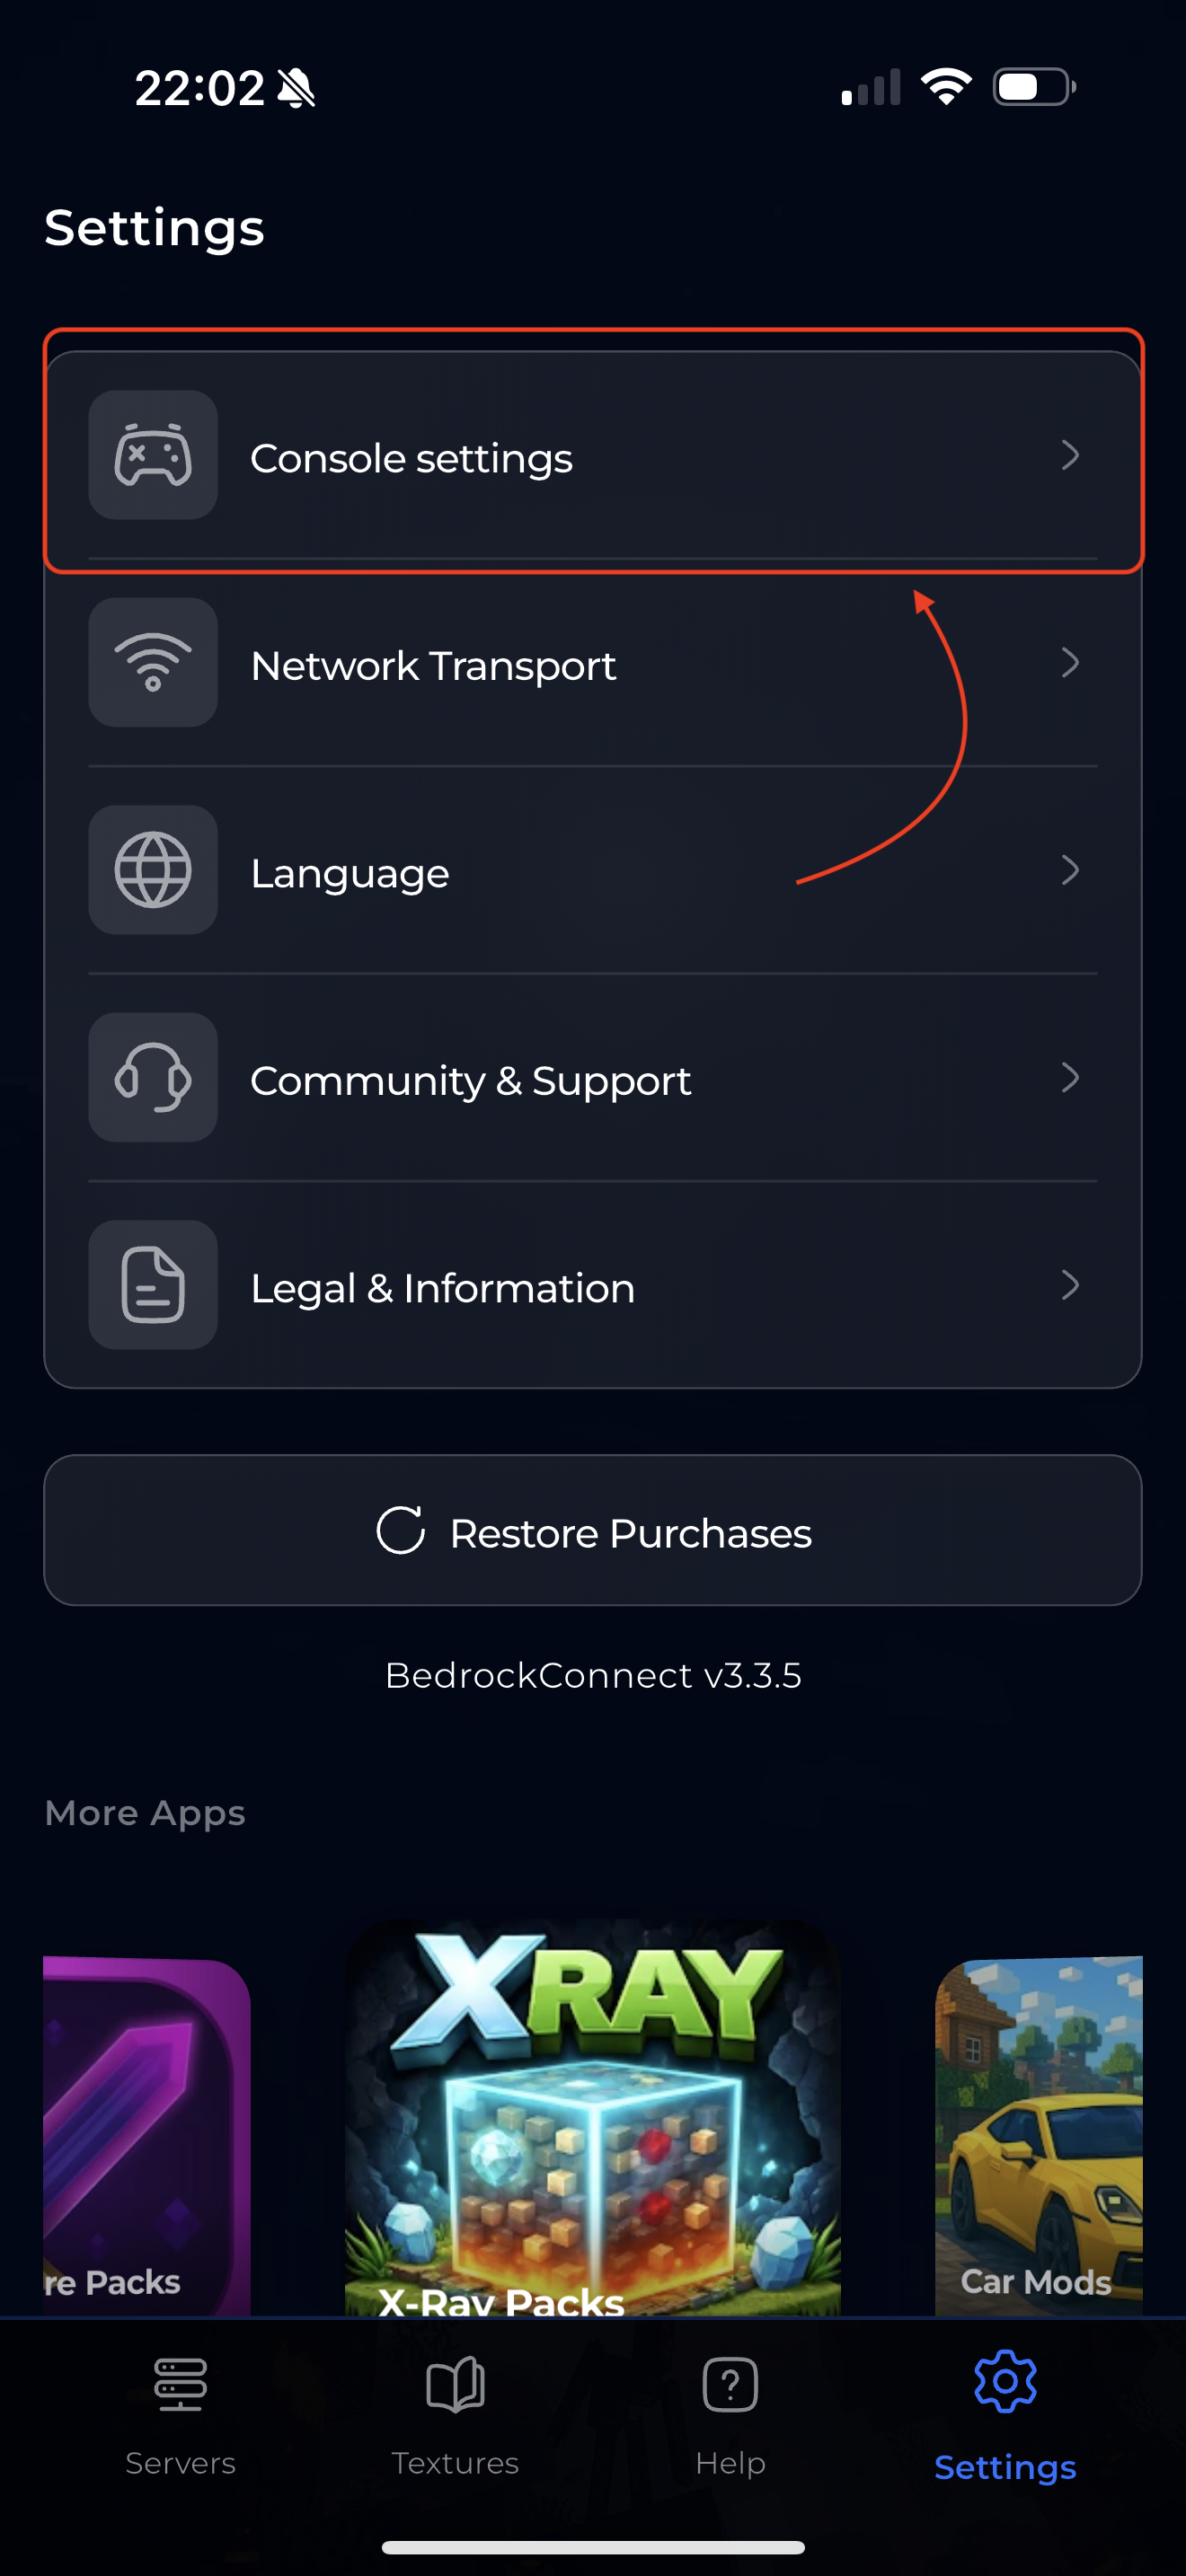
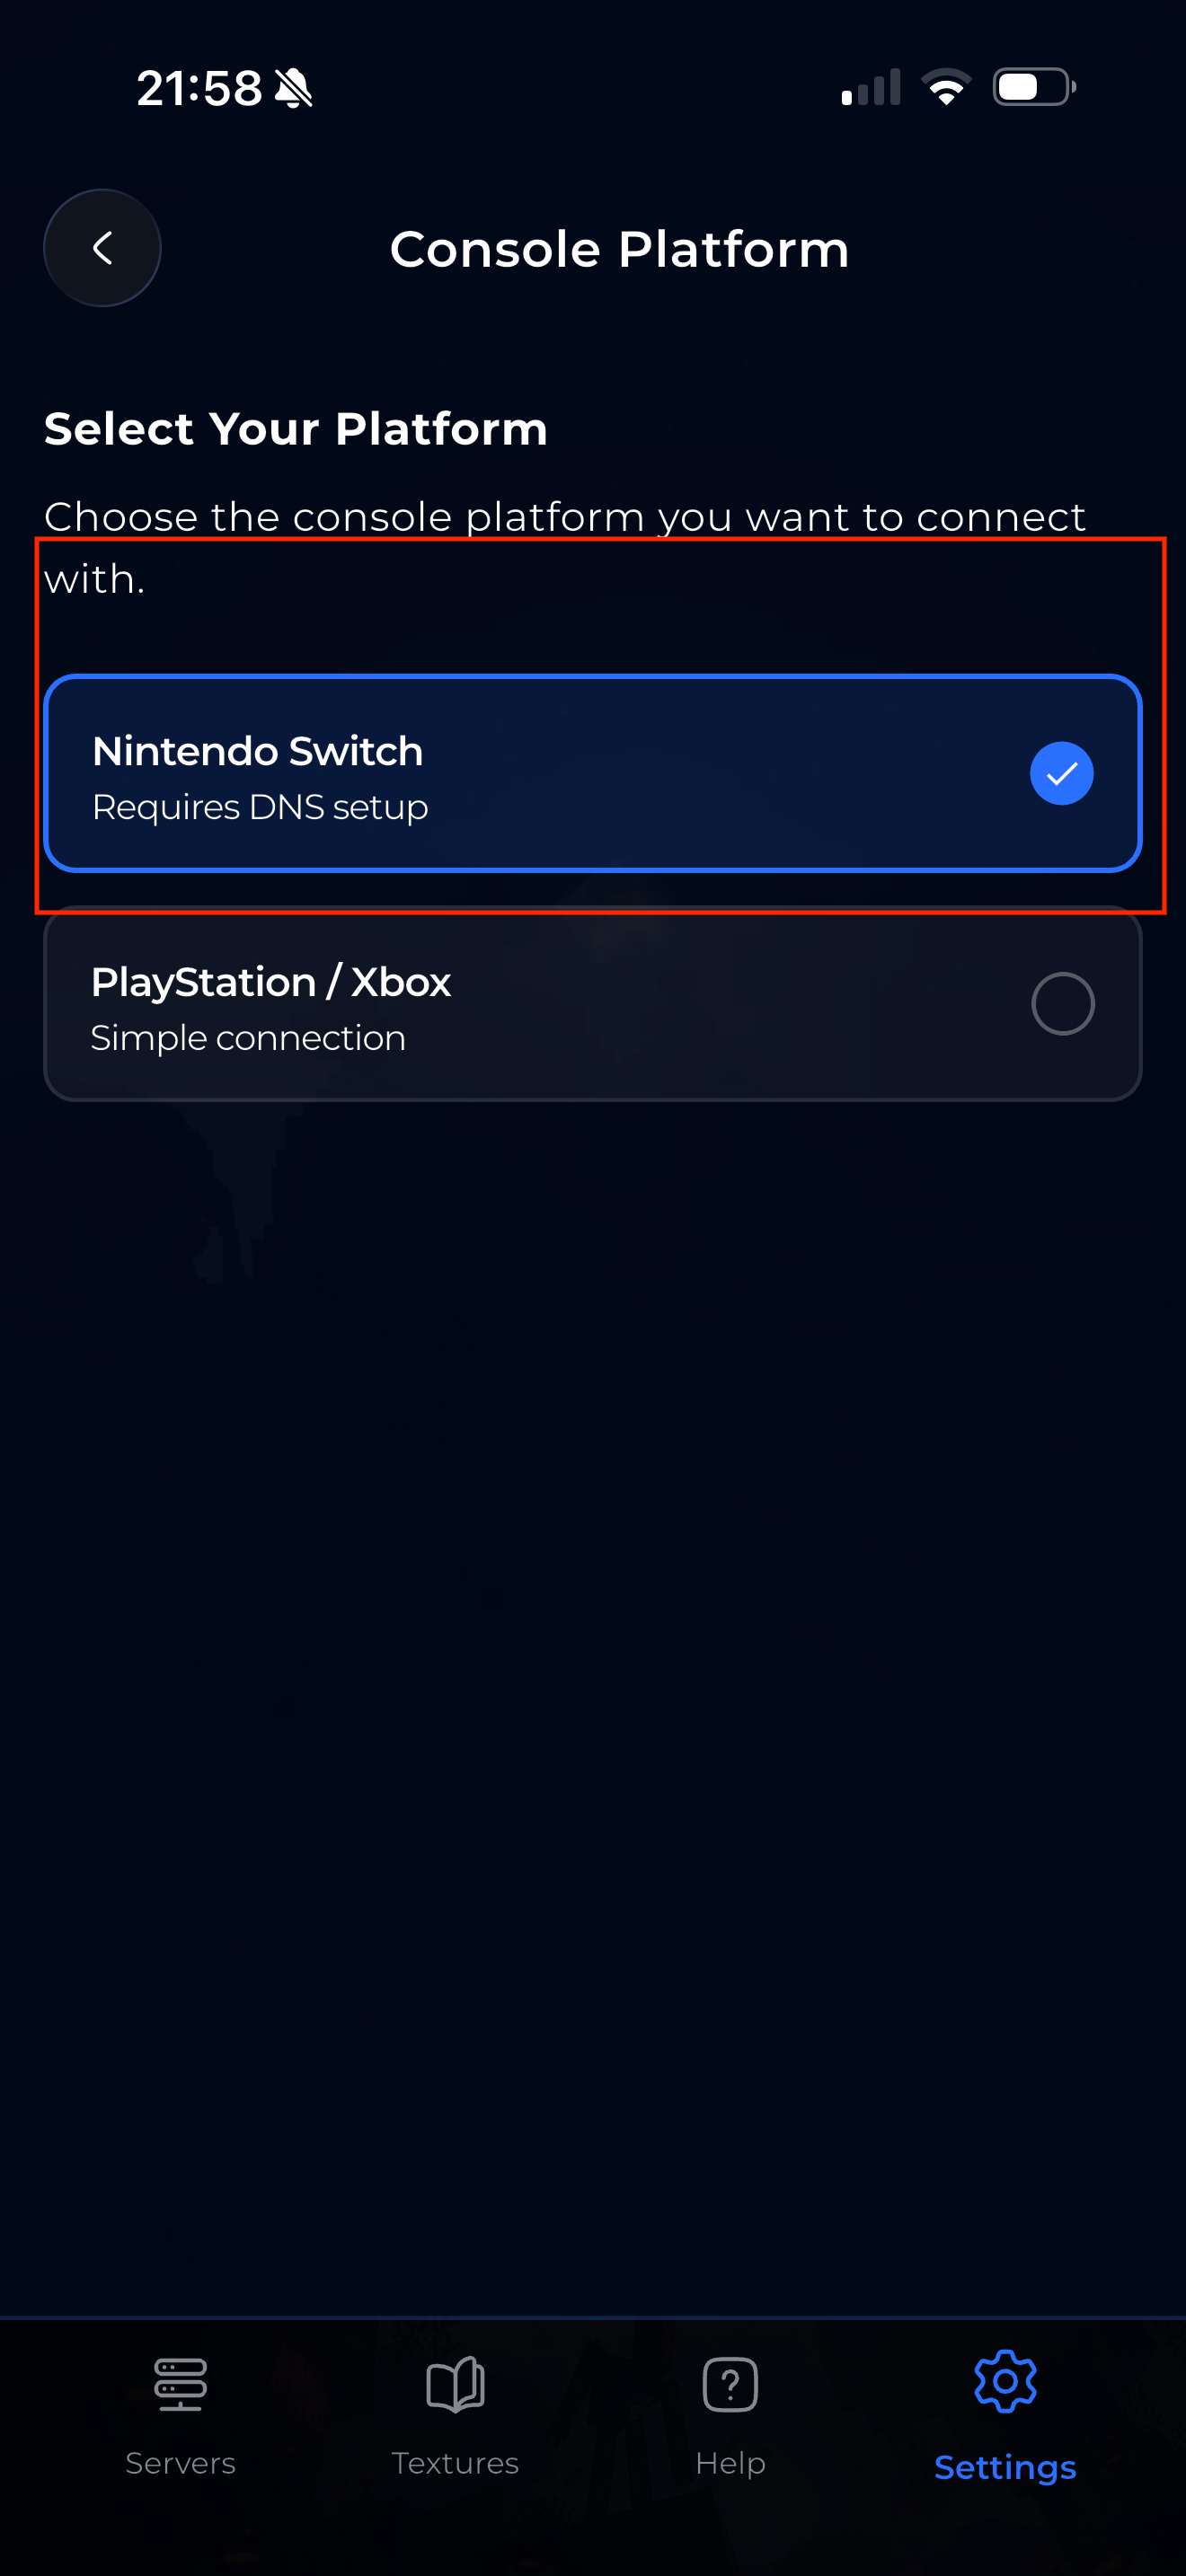
2. Select Nintendo Switch as your console
This is important — the app needs to know you're connecting a Switch.
Go to Settings (bottom right) → tap Console Settings → select Nintendo Switch.
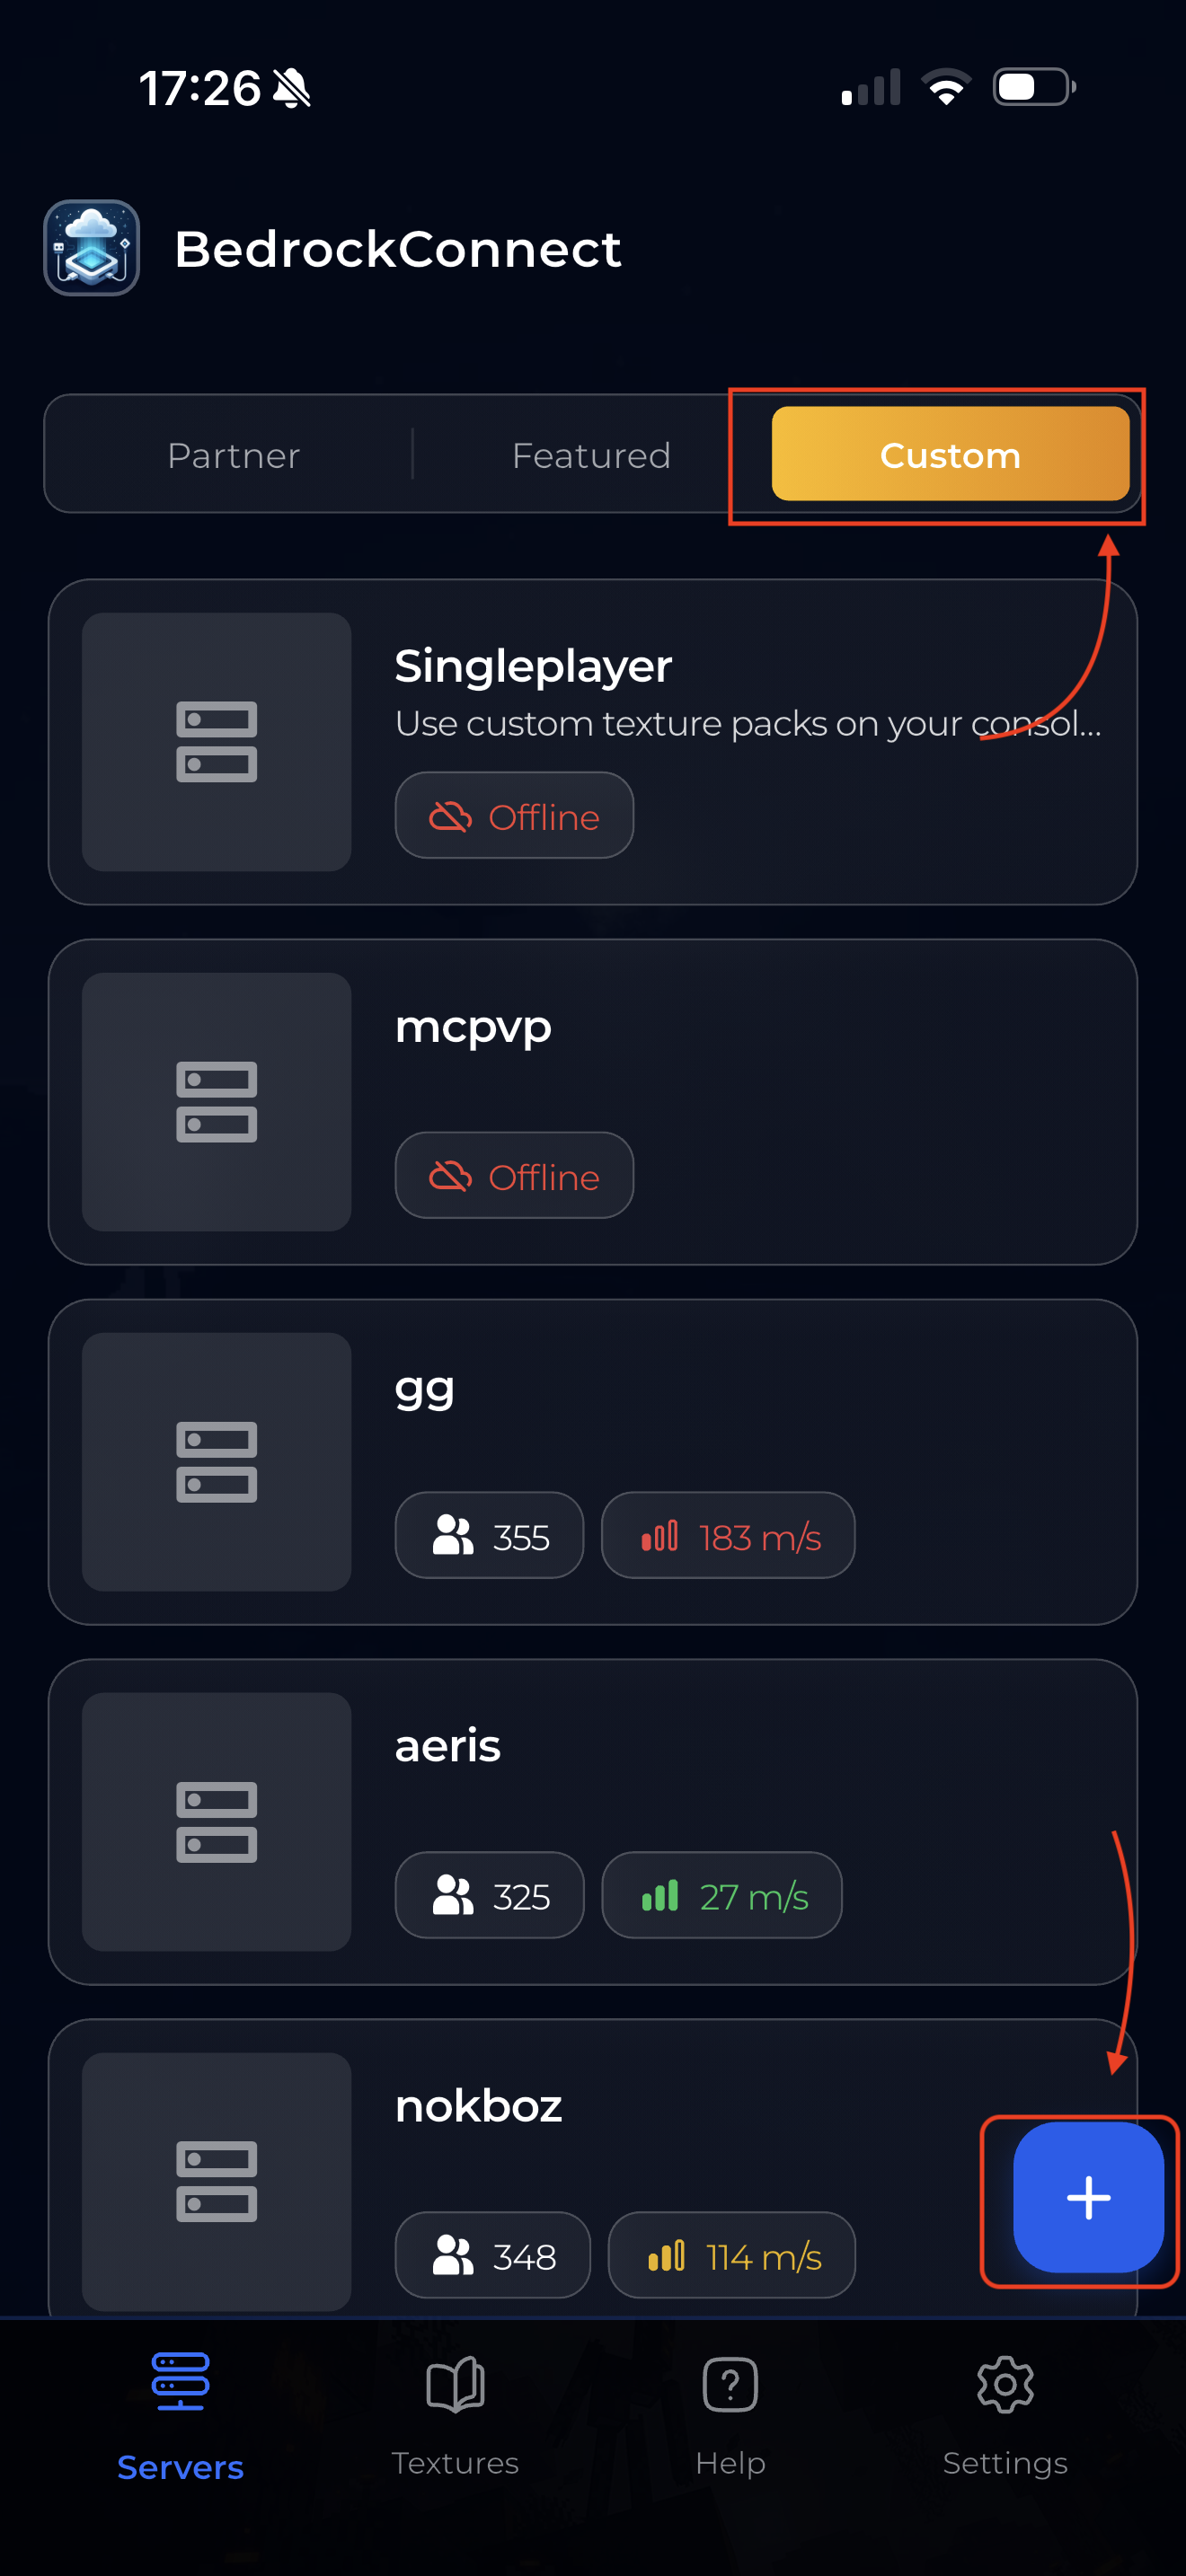
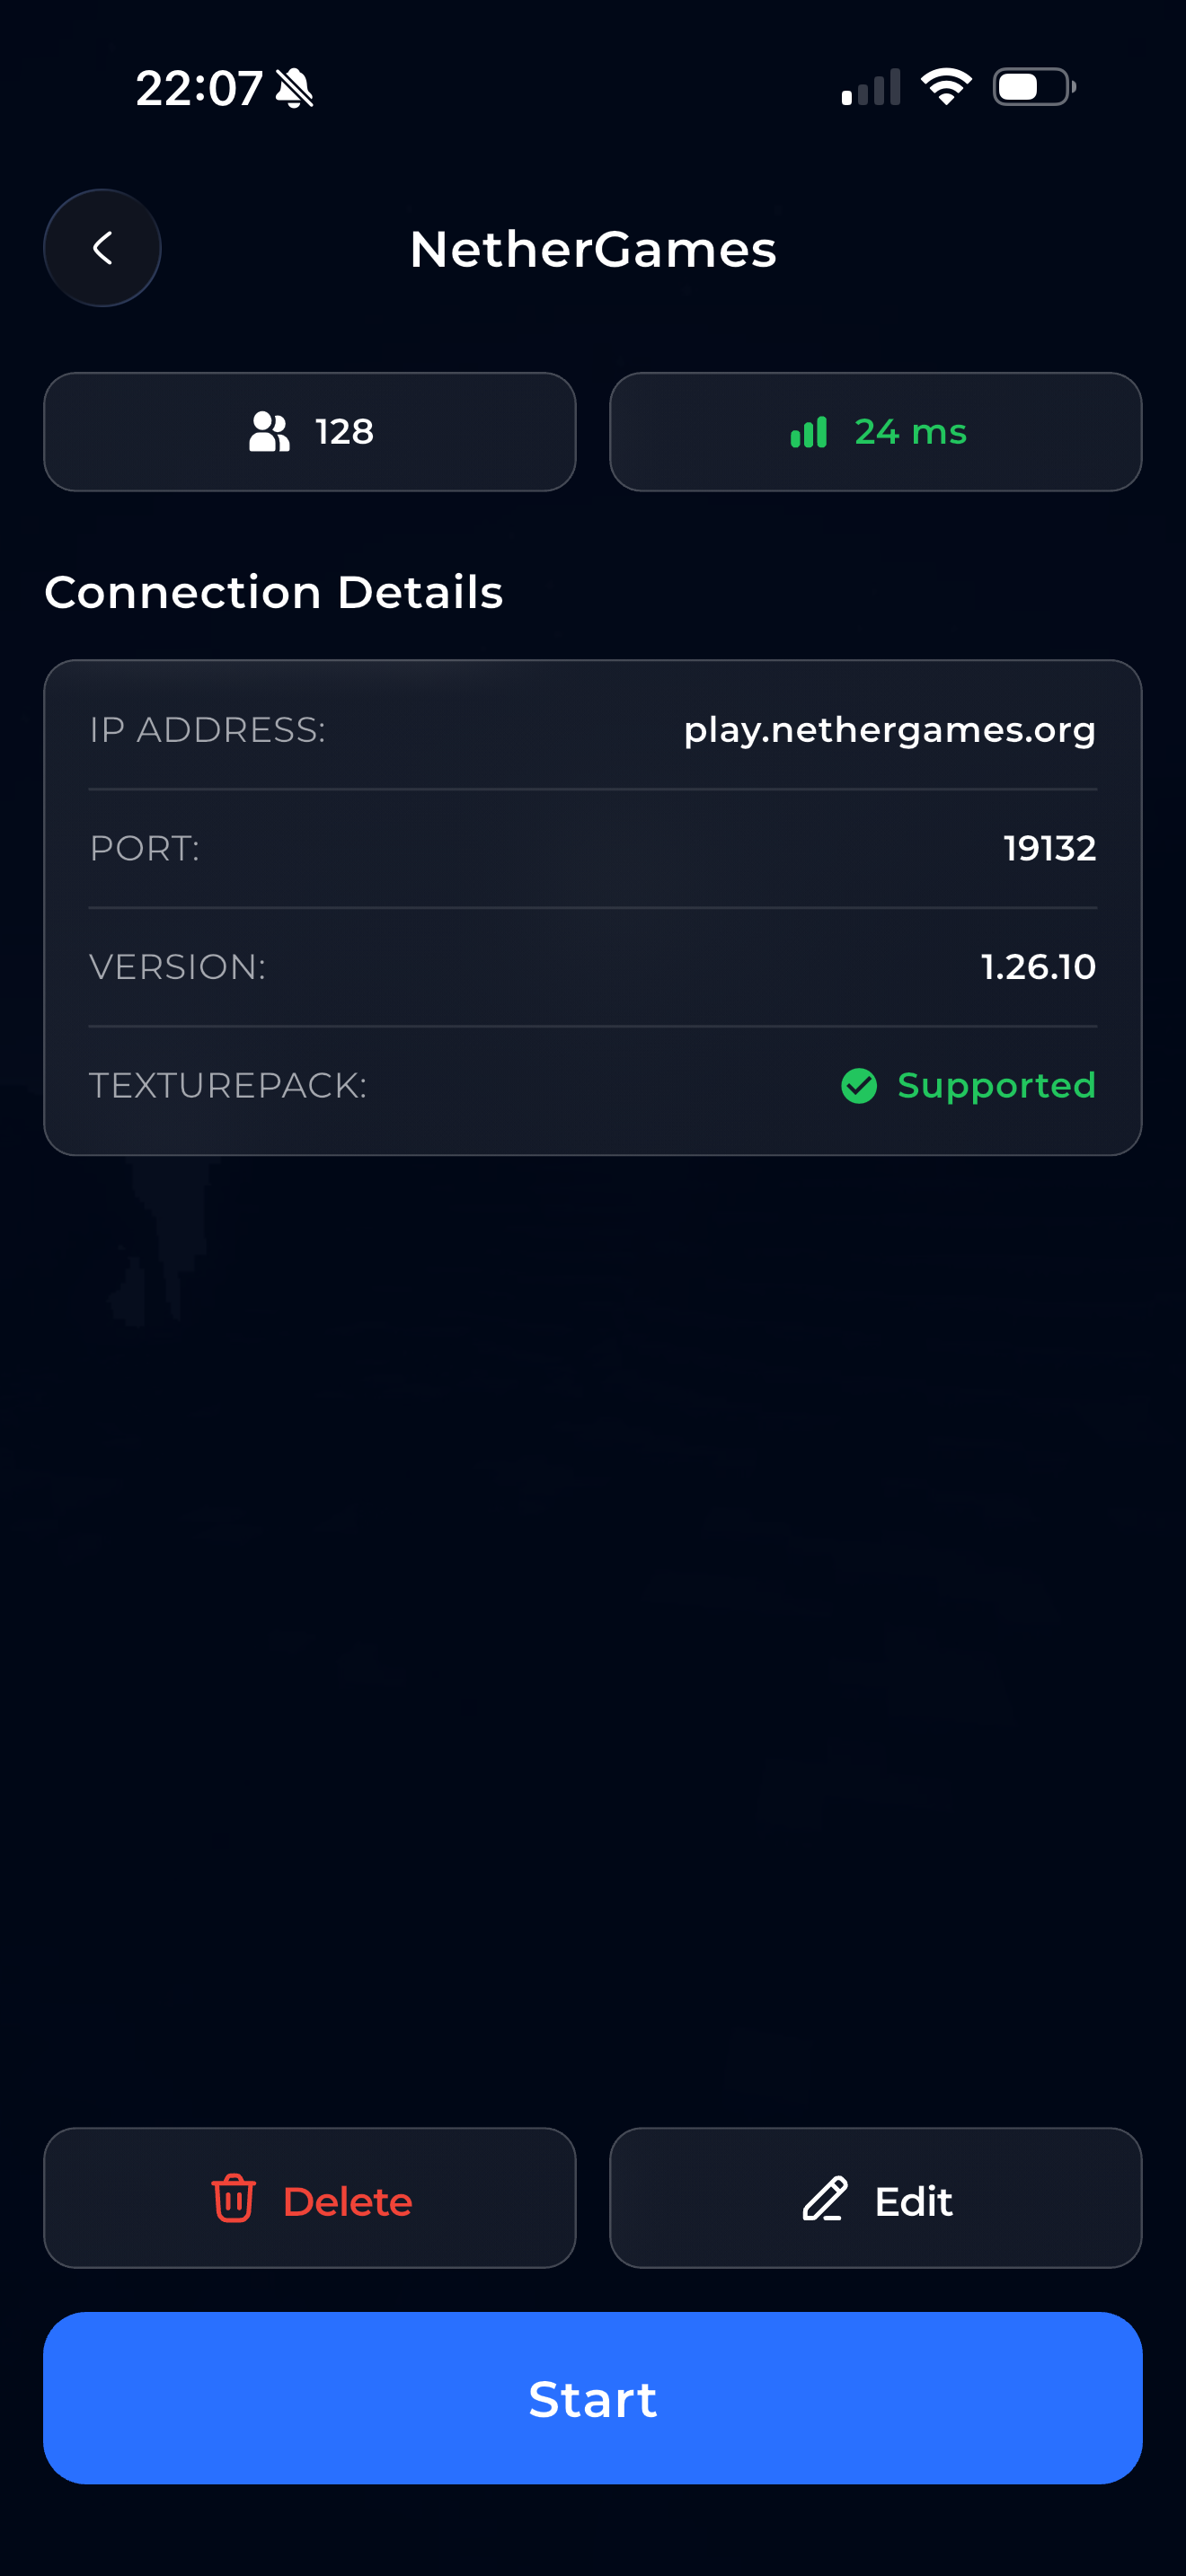
3. Add a server
Go back to the Servers tab. Tap "Custom" at the top, then tap the blue + button in the bottom right corner.
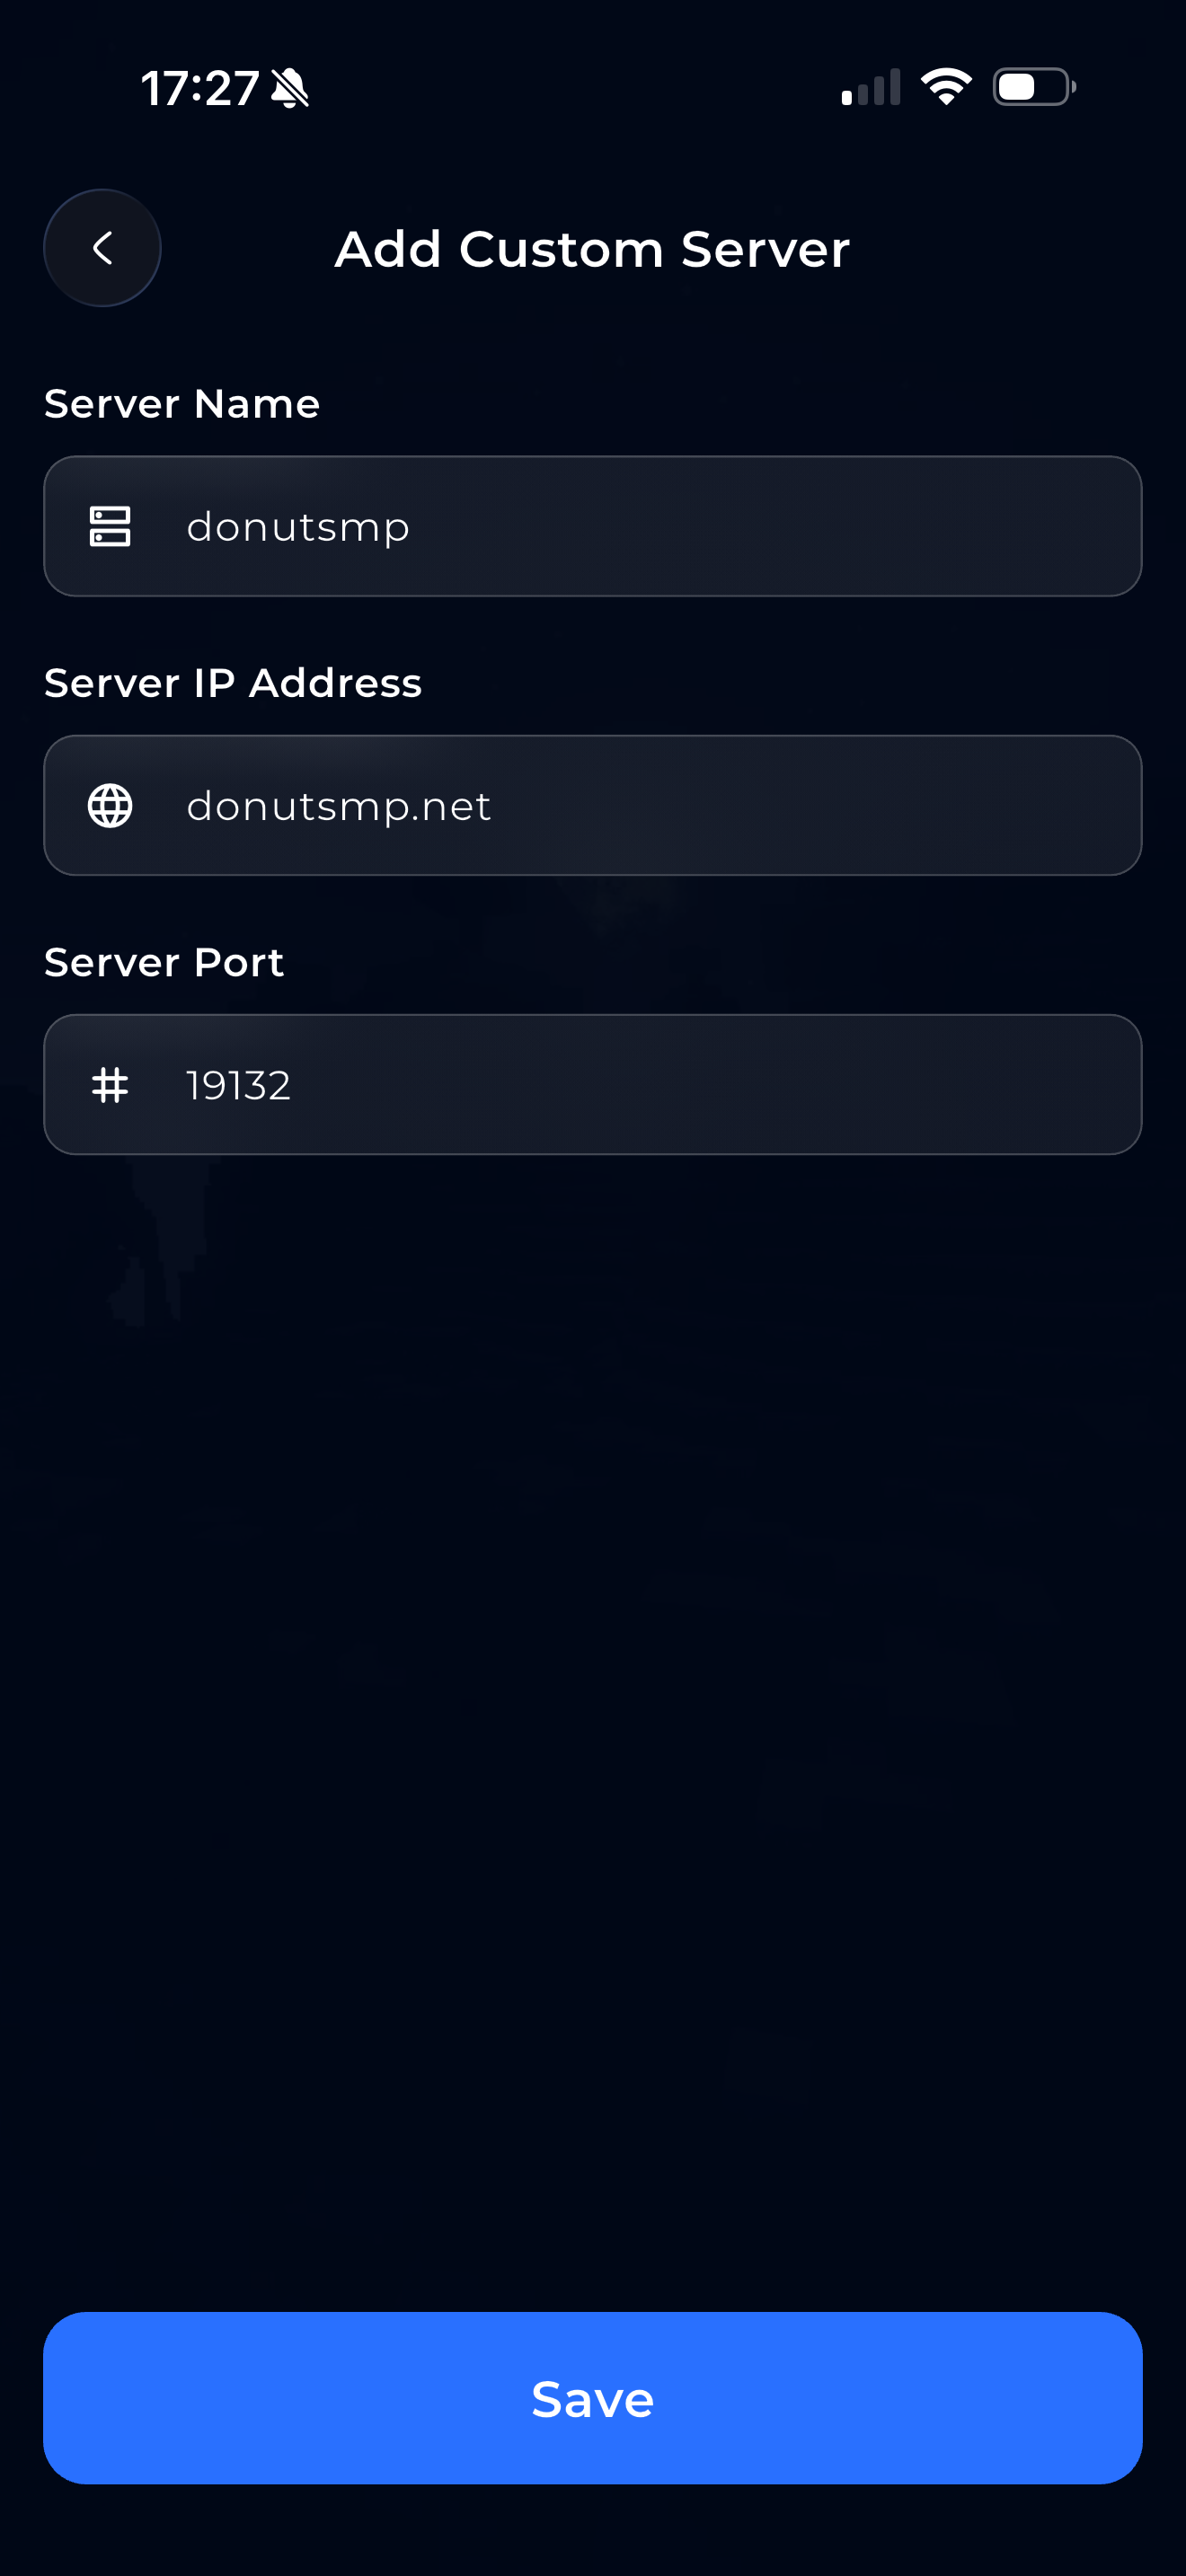
Enter the server's name, IP address, and port (usually 19132), then tap Save.
4. Start the server
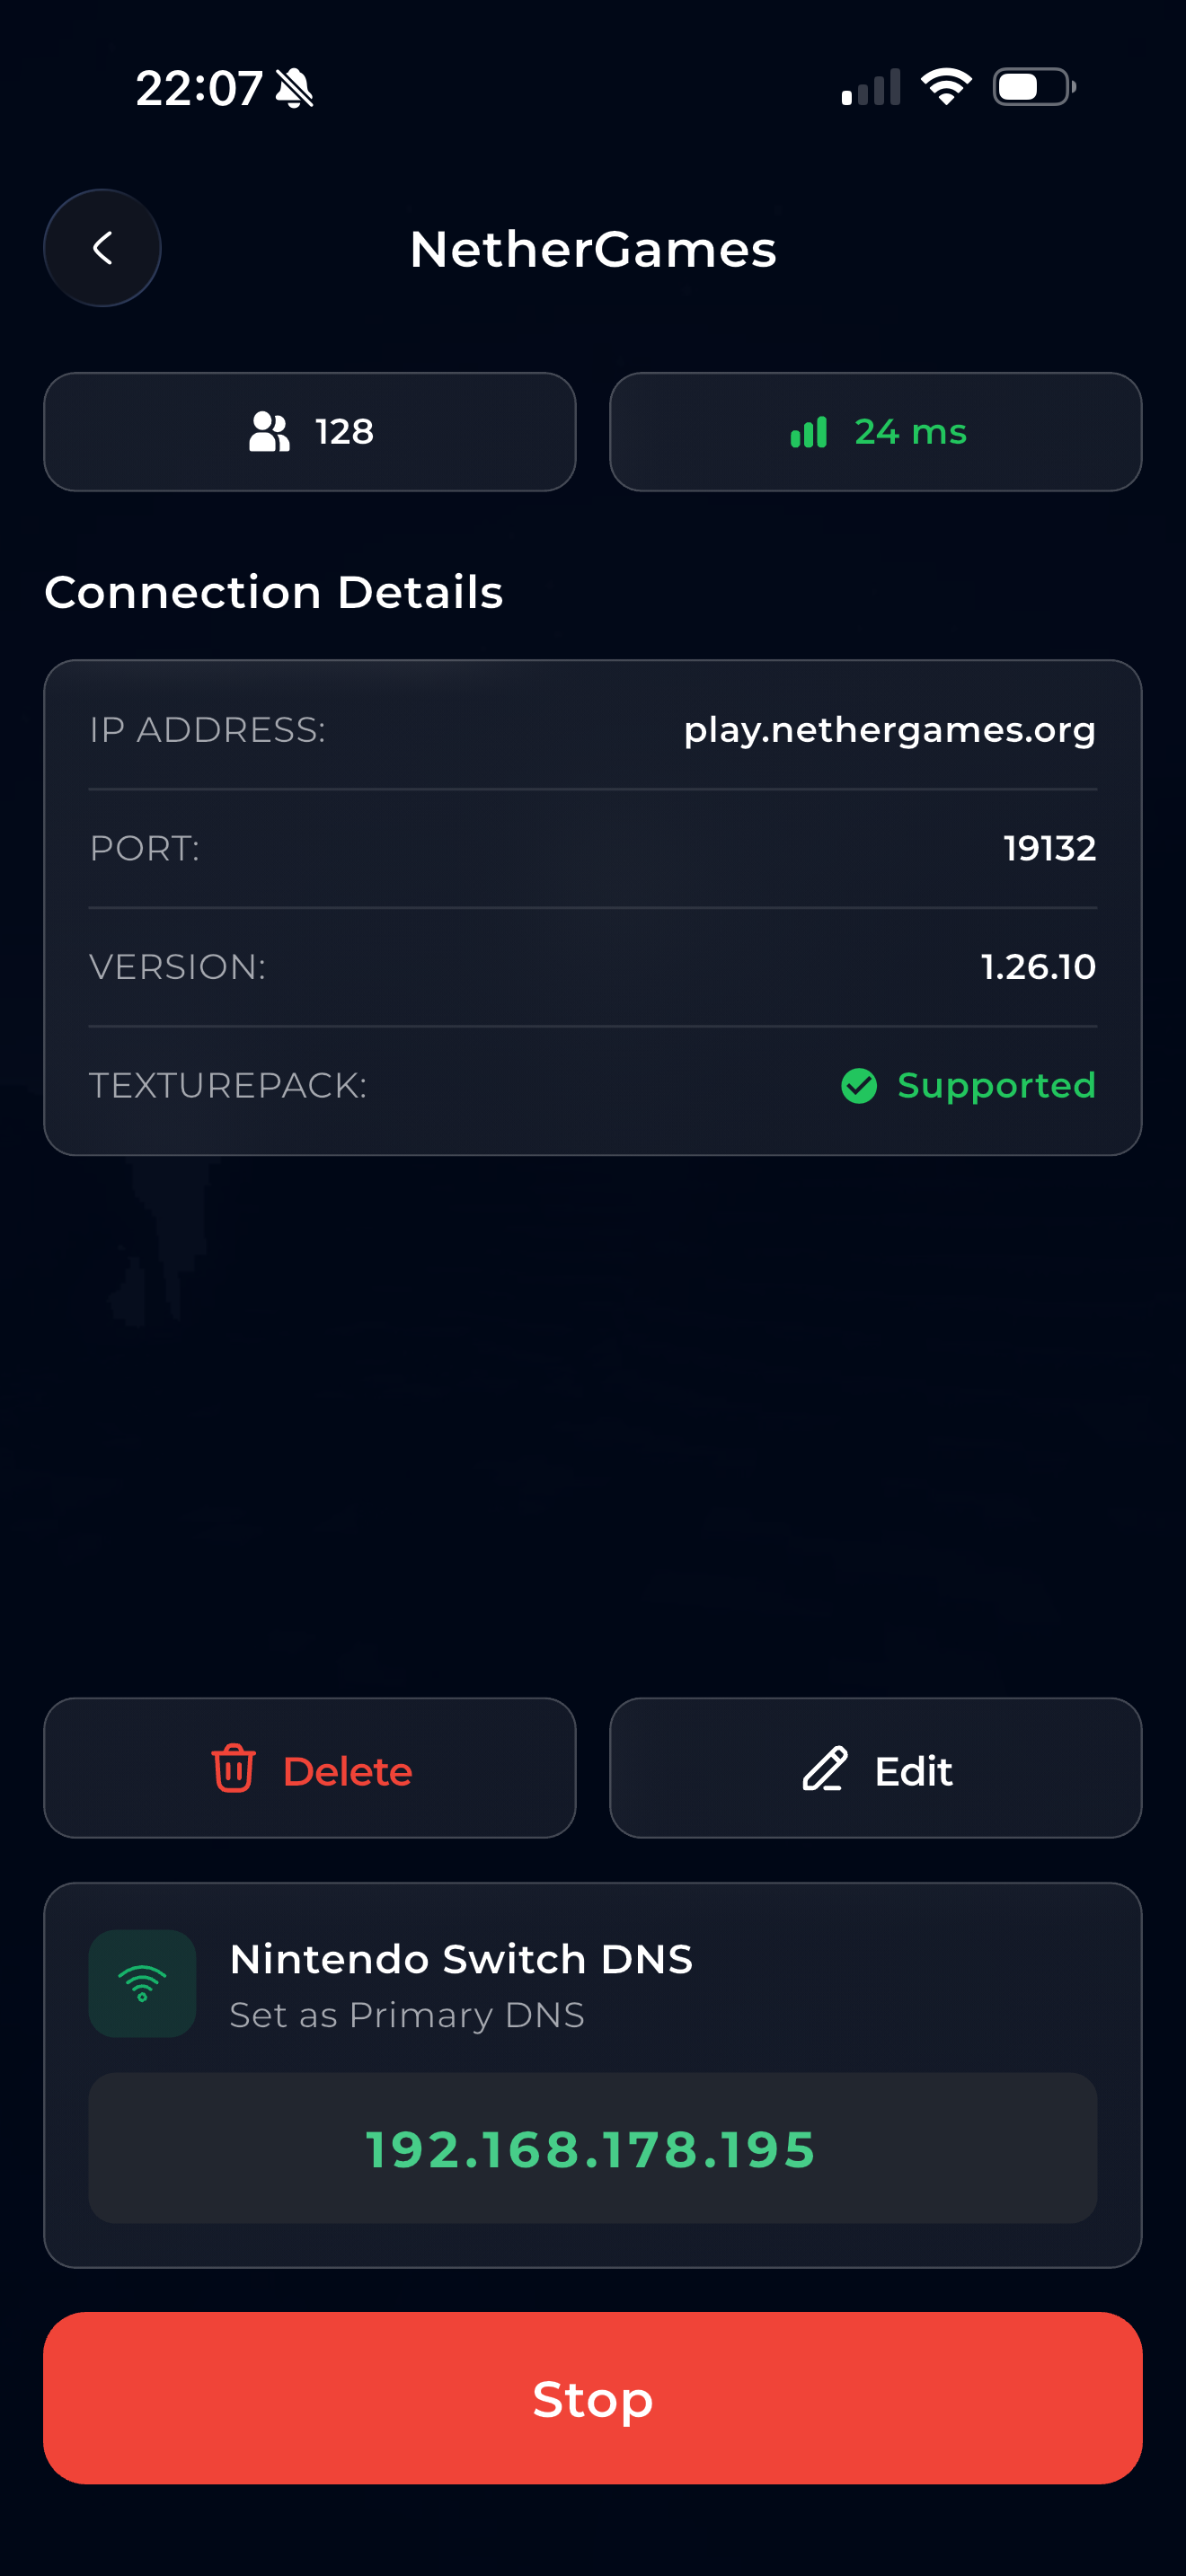
Tap the server you just added. You'll see the server details. Tap the blue "Start" button.
Without Premium, the button says "Watch Ad & Start" — you'll watch a short ad first, then the server starts. With Premium, it starts instantly.
Once it's running, two things happen:
- The button turns red and shows "Stop"
- A green box appears showing your Nintendo Switch DNS address — this is your iPhone's IP address. Remember this number! You'll need it in the next part.
5. Allow local network access
A popup may appear asking to connect to devices on your local network. Tap OK — this is required.
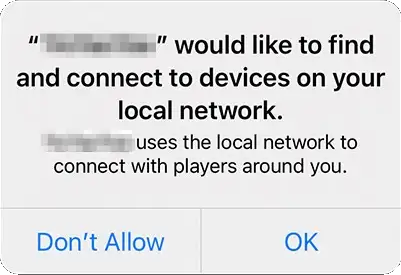
Go to iPhone Settings → scroll down to BedrockConnect → enable Local Network. Then restart the app.
Keep the app open! Don't close it — your Switch needs it running.
Part 2: Set up your Nintendo Switch
Now pick up your Switch. You need to change the DNS settings so your Switch connects through your iPhone.
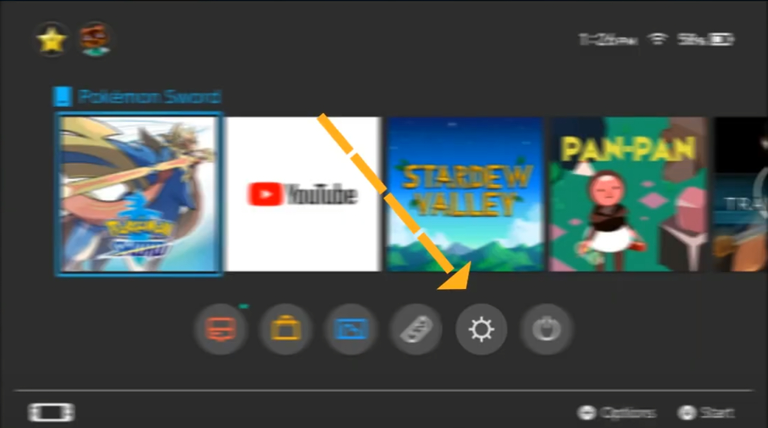
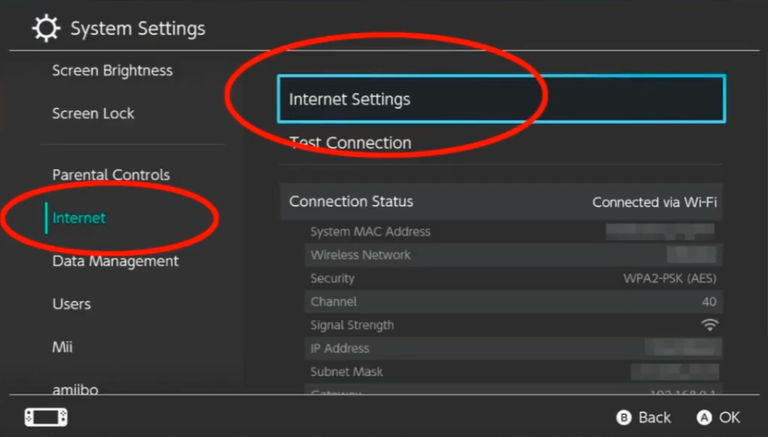
6. Open System Settings
On the Switch home screen, tap the gear icon to open System Settings.
7. Go to Internet Settings
In the left menu, tap Internet. Then on the right side, tap Internet Settings.
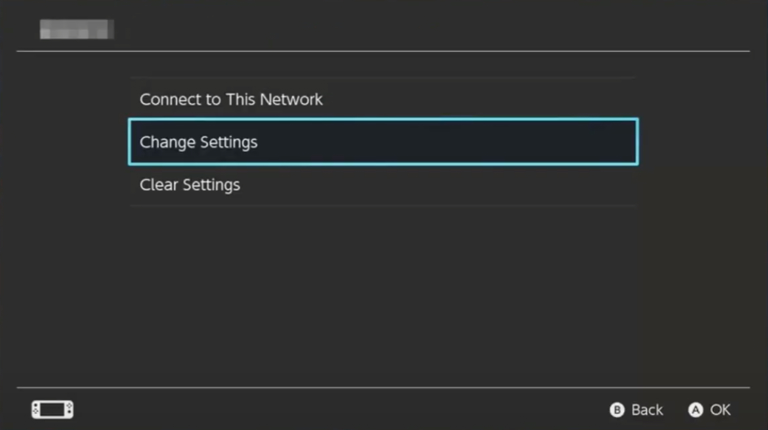
8. Change Settings for your Wi-Fi
Select your Wi-Fi network and tap "Change Settings".
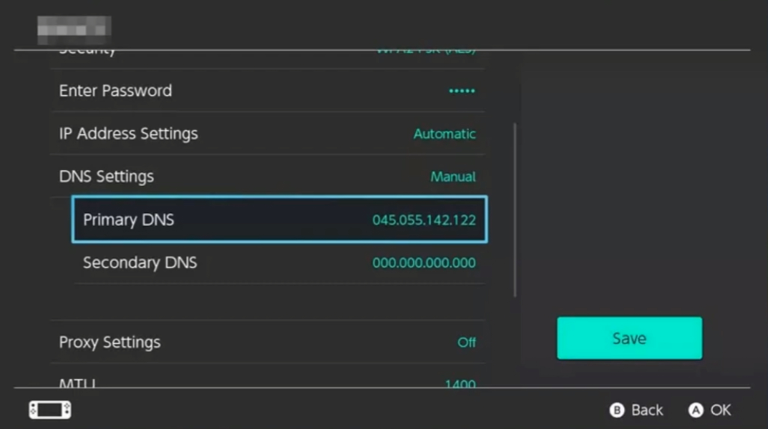
9. Set DNS to Manual
Scroll down to DNS Settings and change it from "Automatic" to "Manual".
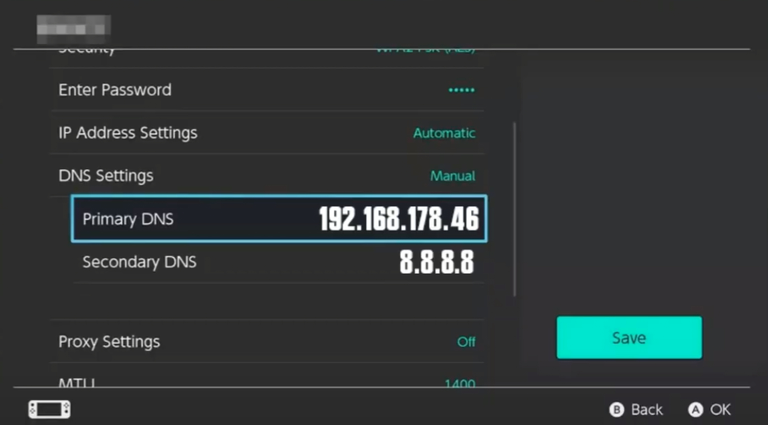
10. Enter the DNS address from the app
Now type in the green DNS address from step 4 as the Primary DNS. For example: 192.168.178.46.
You can set the Secondary DNS to 8.8.8.8.
Then tap Save.
11. Restart your Switch
This is important — do a full restart, not just sleep mode. Hold the power button and tap "Restart".
Part 3: Join the server
12. Open Minecraft and join a Featured Server
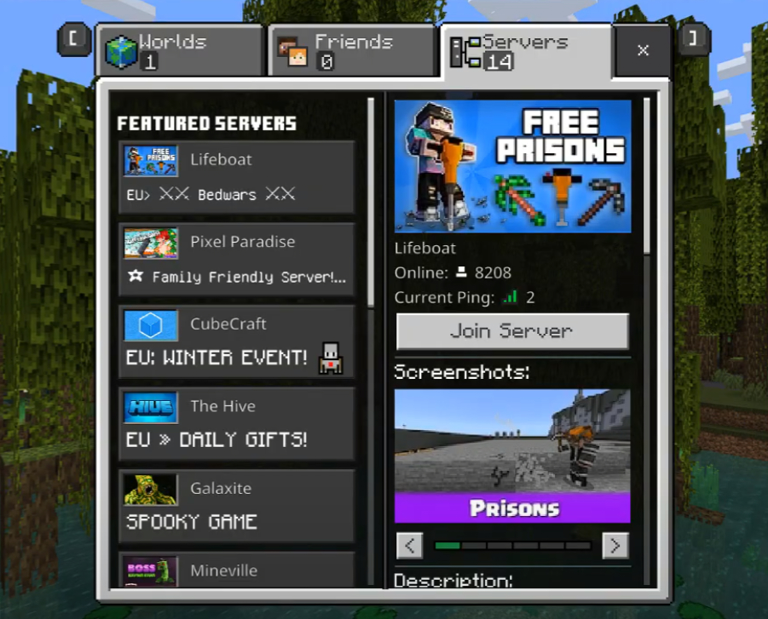
Open Minecraft on your Switch. Go to the Servers tab and join any Featured Server — for example The Hive or Lifeboat.
On Xbox and PlayStation, the server shows up in your world list as a LAN game. The Switch does NOT support this — it can't see LAN worlds at all.
Instead, the Switch uses a DNS trick: because you changed the DNS settings to your iPhone's IP address, all traffic to Featured Servers gets redirected. So when you tap "The Hive", you're not actually joining The Hive — BedrockConnect intercepts the connection and sends you to the server you selected in the app.
That's why you need to join a Featured Server, not look for a LAN world.
Check our Troubleshooting Guide — especially the Switch-specific section.
Once you're connected, you can close the BedrockConnect app on your iPhone. It only handles the initial connection.